A shop runs on more than one pair of hands. Give every cashier and manager their own sign-in, then decide exactly what each of them can see and do. This chapter also walks through every Settings page.
Invite your team
From the Main Menu open Administration, then Users & permissions. To invite someone who already uses Seyls:
- Click Invite User and enter their Seyls username.
- They see the invitation on their own account home page, with Accept and Decline buttons.
- Once they accept, they join your outlet as staff.
For someone brand new to Seyls, click New User instead. It creates a fresh account already attached to your outlet, then takes you straight to their permissions. Open invitations show on the same screen with a Remove action if you change your mind.
Control what each person can do
Click any person in the team list to open their page. Permissions come in two layers:
- Module Access: an on and off switch per module. A module that is off simply cannot be opened by that person.
- Access Controls: fine-grained switches, such as creating sales, refunding sales, confirming goods received, or viewing product cost.
From the same page a business admin can use Make Admin for business-wide rights, or Remove User, which cuts access immediately but keeps their history. Only business admins can change permissions, and every switch applies per outlet, so the same person can have different rights in each shop.
Switching outlets
You work inside one outlet at a time. After signing in you land on your account home page, where each business lists its outlets, each with an Enter button. To move shops, use Sign out of outlet and enter a different one. Everything, from sales to settings, belongs to the outlet you are in.
A tour of Settings
From the Main Menu open Settings. The overview shows your plan, outlet, base currency and active taxes at a glance, with every page listed on the left.
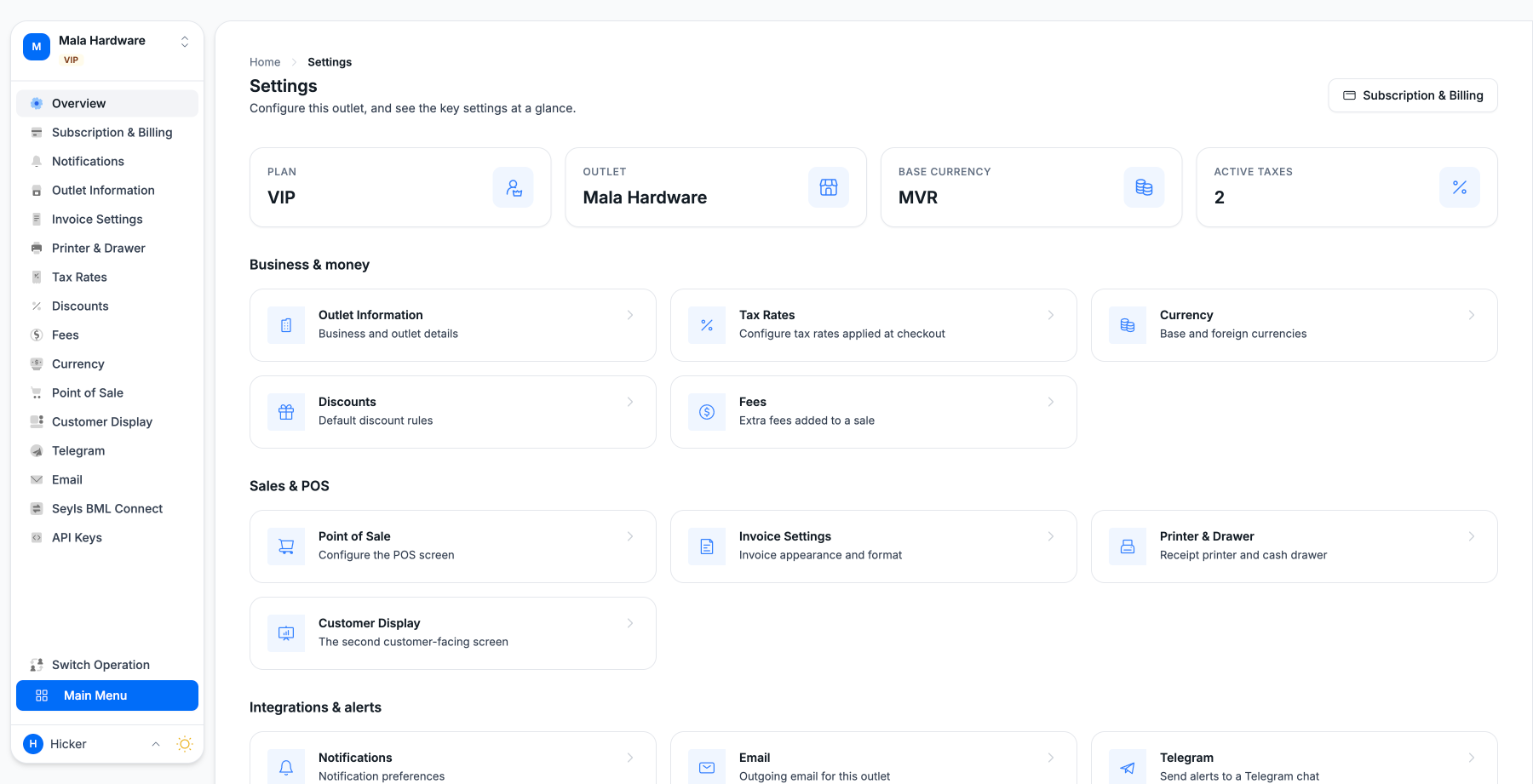
- Subscription & Billing: compare plans, subscribe or swap, manage your card, and download invoices.
- Notifications: push alerts for sales, refunds, low stock and shrinkage, with a test button.
- Outlet Information: the name, TIN, address and contact details printed on your documents.
- Invoice Settings: invoice logo, template choice, document numbering, footer notes, stamps and signature.
- Printer & Drawer: receipt printer, footers, auto printing, auto-open drawer, and a test print.
- Tax Rates: the tax rates applied at checkout.
- Discounts: default discount rates and a maximum discount limit.
- Fees: extra fees added to a sale, fixed or percentage, optionally taxable.
- Currency: your base and foreign currencies and their rates.
- Point of Sale: fine-tune the sale screen, from selling without stock to hold bills and rounding.
- Customer Display: the bank transfer QR code and promotional images on the shopper-facing screen.
- Telegram: send the outlet's alerts to a Telegram chat.
- Email: outgoing email for the outlet, with a test email.
- Seyls BML Connect: automatic verification of incoming Bank of Maldives transfers.
- API Keys: keys that let other software connect to this outlet. Each key is shown once, so copy it right away.
Your own password and photo live under My Profile, so everyone can manage those without the Settings module.
The Seyls mobile app
Sign in with the same account, pick your business and outlet just like on the web, and sell from anywhere in the shop. The app supports sales, cash registers, customer and credit sale lookups, credit payments, a today's sales widget, and the customer display. Push notifications go to the phones registered in the app. Whether a staff member sees sales totals there is its own access control on their user page.