Products are never finished. Prices move, packaging changes, stock ends up at the wrong outlet, and some of it gets damaged or expires. This chapter covers everything you do to a product after it exists. From the Main Menu open Inventory; the left menu holds everything described here.
Find and open a product
Inventory in the left menu opens your product list. Search by name or code, and scan each row for the product's code, image, price per unit, latest vendor, and stock balance. If your outlets share products, an arrow next to the balance expands the stock held at every other outlet, with a total.
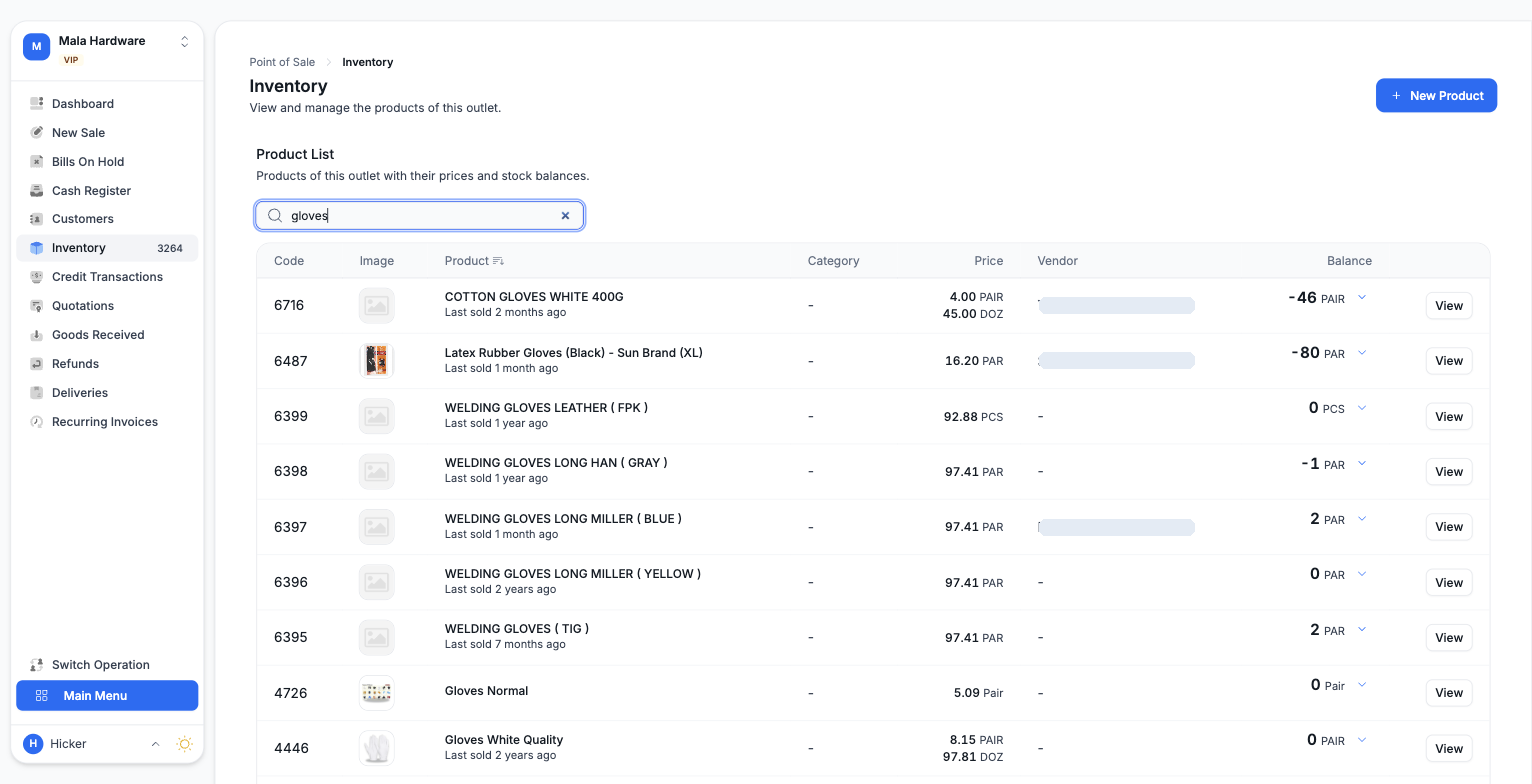
Click a product to open its page, with tabs for details, inventory, transfers, images, received stock, sales, pricing, and analytics.
Edit details, but not stock
The Details tab holds the barcode, description, category, tax rate, reorder level, and other settings. Change what you need and press Update Product Details. For the category, type to search your existing ones, or let us suggest one for you; new category levels are only created after you confirm.
One rule to remember: stock quantities never change from this form. Stock only moves through goods received, transfers, shrinkage, or stock takes.
Units and price history
Under Product Units, press New Unit to add packs and cartons. Give the unit a name, its own selling price, and tell us how many base units it contains. Selling one carton then deducts the right number of pieces from stock. The first unit is the base unit, and it is what your stock is counted in.
Every unit keeps a price history. Press History on a unit to see who changed the price, from what to what, and when.
Images
The Images tab accepts JPG, PNG, or GIF files up to 10MB. The first image becomes the thumbnail shown everywhere, marked Primary.
Tags
Tags are quick labels you add or remove from the chips at the top of the product page. The Tags screen lists every tag, shows how many products carry it, and lets you view them. A tag can only be deleted once no product uses it.
Transfers between outlets
Transfers need product sync turned on first, from the Administration module's Synchronization page. Then open Internal Stock Transfer in the Inventory menu.
- Press Transfer, add products and quantities, and pick the outlet to transfer to. You cannot send more than you have available.
- Press Complete Transfer. This creates a pending transfer and a goods received document at the destination.
- The destination outlet confirms that goods received. Only then is stock deducted here and added there.
You can also press Request to ask another outlet for stock. They process your request, and you confirm the goods received it creates for you.
Shrinkage
Press Shrink on a product to record damaged, lost, expired, or miscounted stock, with a quantity and remarks. Recording creates a pending entry; stock only leaves when someone confirms it, from the product page or the Shrinkages screen. Confirmation is permanent, so review before pressing it.
Valuation and expiry
The Inventory tab on a product lists each received batch with its cost and expiry date, and items sell in the order they were received. You can edit a batch's cost price and expiry date, but not its quantity. The Inventory Valuation screen totals the value of everything in stock, cost times balance. Cost figures stay hidden from users without cost access.
Import and export
Inventory Export downloads your products as a CSV or Excel file, prepared in the background and listed under recent exports when ready. It does not include pack definitions, so extra units are not recreated on a re-import.
Inventory Import walks you through uploading a CSV, matching its columns to our fields, previewing the first rows, and importing with live progress. Only an item code and description are required; rows that fail are listed so you can fix and retry them.