Changelog

What's new in Seyls

Every improvement we ship, explained in plain language.

19 August 2026

Set selling prices and expiry dates while you receive stock

Two new shortcuts on the New Purchase and Goods Received screens help you price products and track expiry the moment stock arrives.

When new stock arrives, two questions usually follow: what should we sell this for now, and when does it expire? You can now answer both without leaving the screen you are already on. Every line on the New Purchase and Goods Received screens has two small buttons, one for selling prices and one for expiry.

The new line buttons on a purchase row

Update your selling prices as you buy

Prices from suppliers change, and your selling prices need to keep up. The percentage button opens a window showing every unit you sell the product in, for example pieces and boxes, side by side with:

  • what the unit costs you at the price you are paying on this purchase
  • your current selling price, with a small badge showing your profit margin on it
  • a box to type the new selling price

If you prefer to work with margins, type a markup percentage once and we fill in a new price for every unit. Prices include tax by default, and a switch lets you enter them without tax instead. Either way, the Final column always shows what the customer will pay. Your product prices update when you save the purchase, and every change is kept in the product's price history.
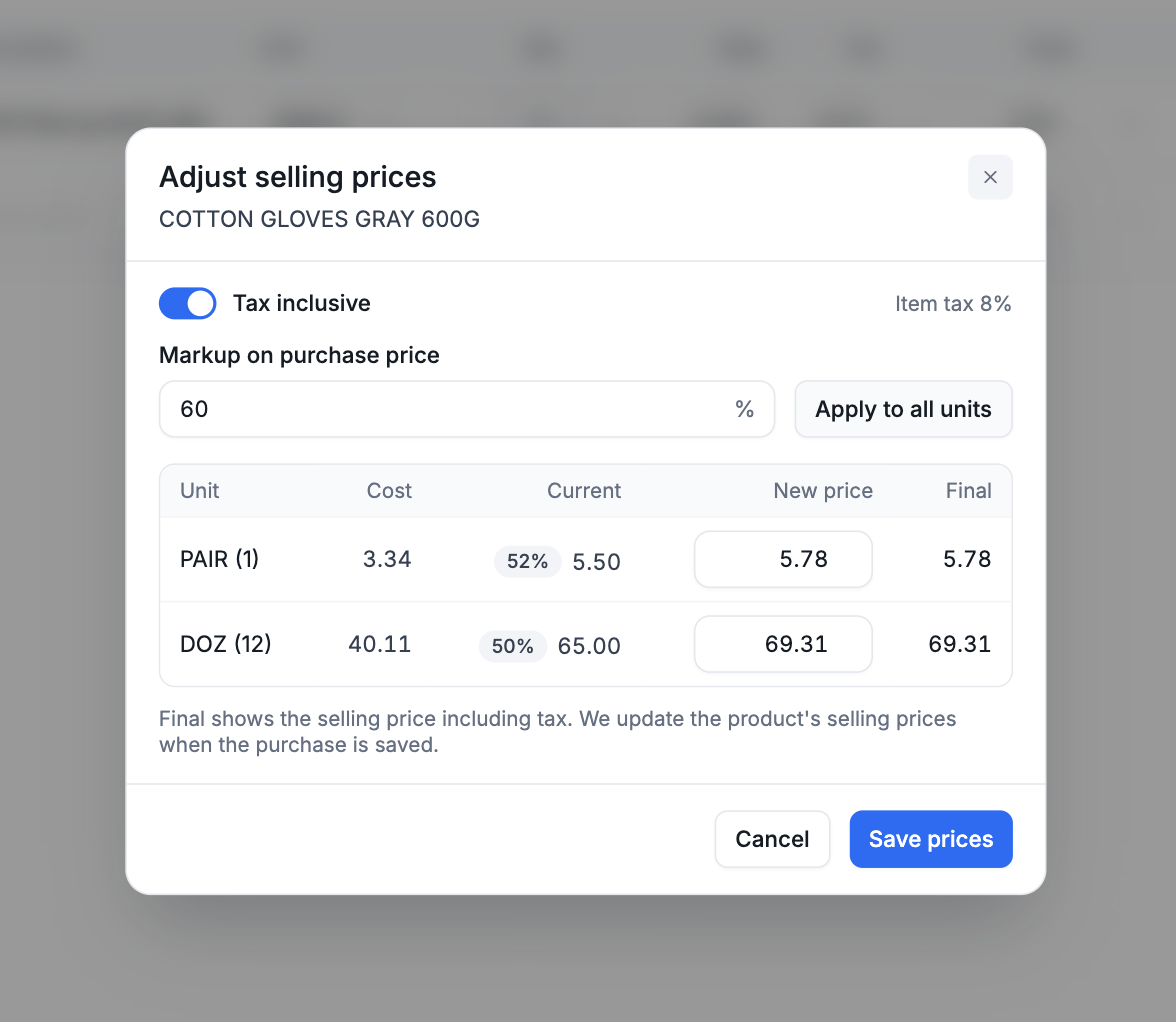
The selling price window with the markup calculator

Track expiry from the day stock arrives

The calendar button lets you set an expiry date for the stock on that line. The date follows the goods all the way into your inventory, so the Expiring Products report can warn you before anything goes to waste. No more separate notebooks or editing stock records after the fact.
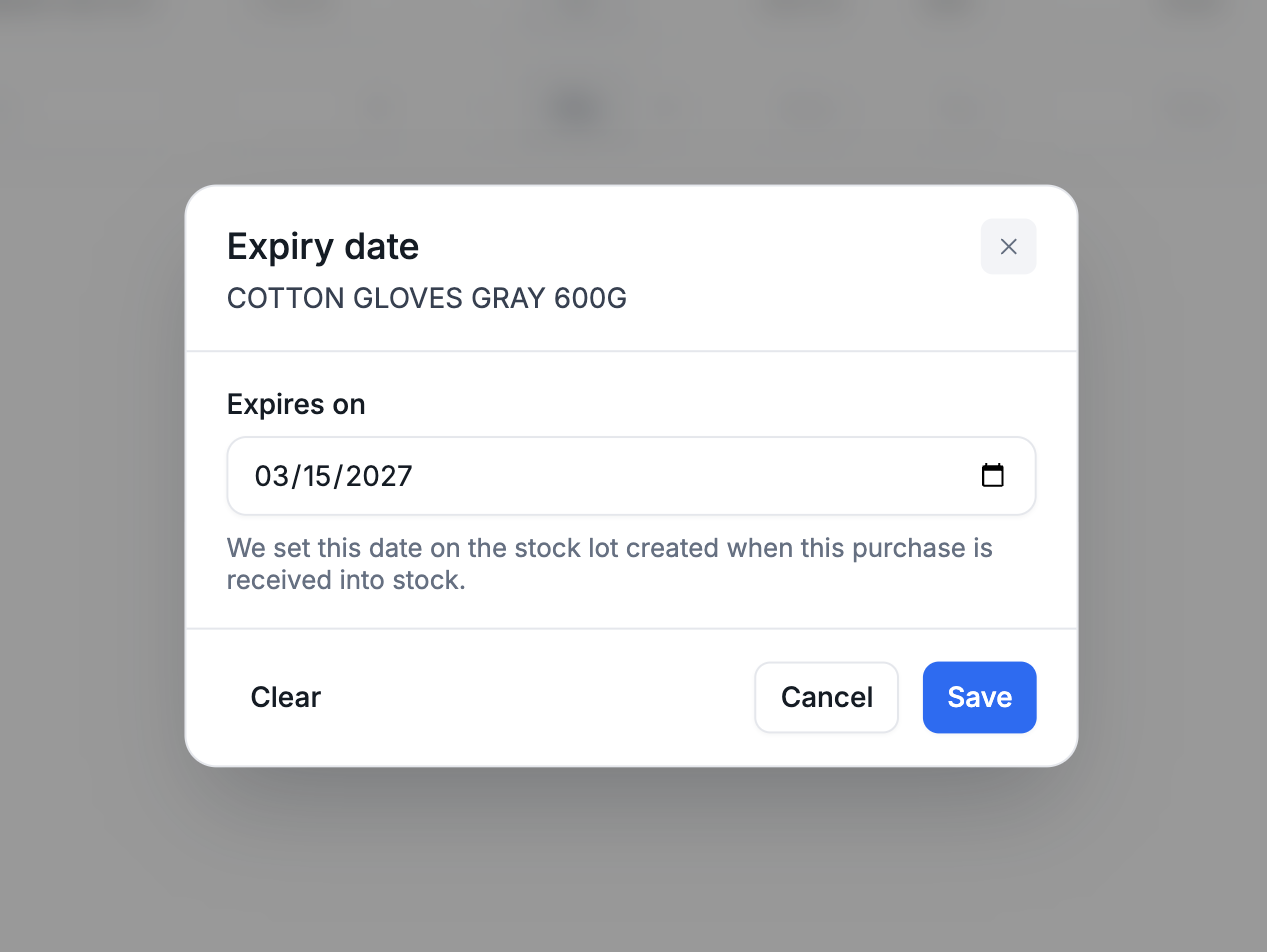
Setting an expiry date for a purchase line

Also improved today

  • The unit dropdown on the purchase, purchase order and goods received screens could shrink until the unit name was hidden. It now always shows the full name.
  • The Goods Received screen's item table now looks and works the same as the New Purchase screen, so both feel familiar.
  • Fixed a behind the scenes error that could stop totals from refreshing after adding a product to a purchase, and another that interrupted switching units on the Goods Received screen.
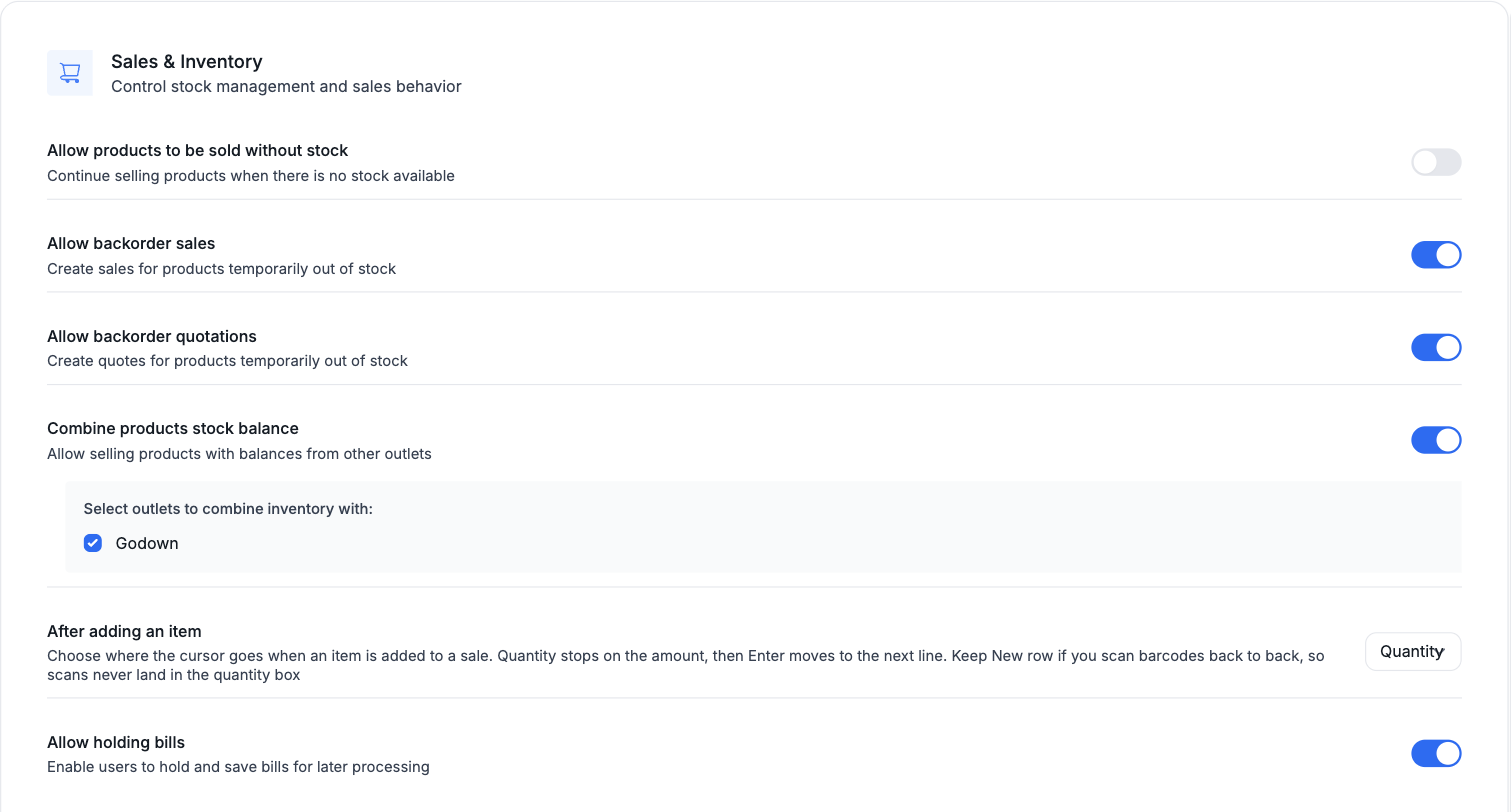
Choose where the cursor goes after adding an item to a sale

A new outlet setting speeds up sales entry for shops that type quantities, without slowing down shops that scan barcodes.

Every shop rings up sales in its own rhythm. Some scan barcodes back to back. Others pick a product, type how many, and move on. The sale screen now adapts to yours.

Under Settings, Point of Sale, you will find a new option called After adding an item with two choices:

  • New row, the default: after you add a product, the cursor jumps straight to the next search box, exactly as before. Keep this if you scan barcodes one after another, so a fast scan never lands in the quantity box.
  • Quantity: the cursor stops on the quantity of the line you just added, with the amount already selected. Type the quantity to replace it, press Enter, and you are on to the next product.

The After adding an item option in Point of Sale settings

The setting is per outlet, so each of your shops can work the way its counter does. It applies everywhere you build a bill: new sales, held bills you resume, duplicated invoices, and quotes you convert to sales. And if you add the same product twice, the cursor finds the line it was combined into, even when the product is on the bill in more than one unit.

12 August 2026

Connect Seyls to your other tools with API keys

Give your webstore, accounting software, or developer safe access to your outlet's data, and switch it off any time.

Many shops run more than Seyls: a webstore, accounting software, or reports someone builds for you. Those tools can now connect to your outlet directly, without sharing your login.

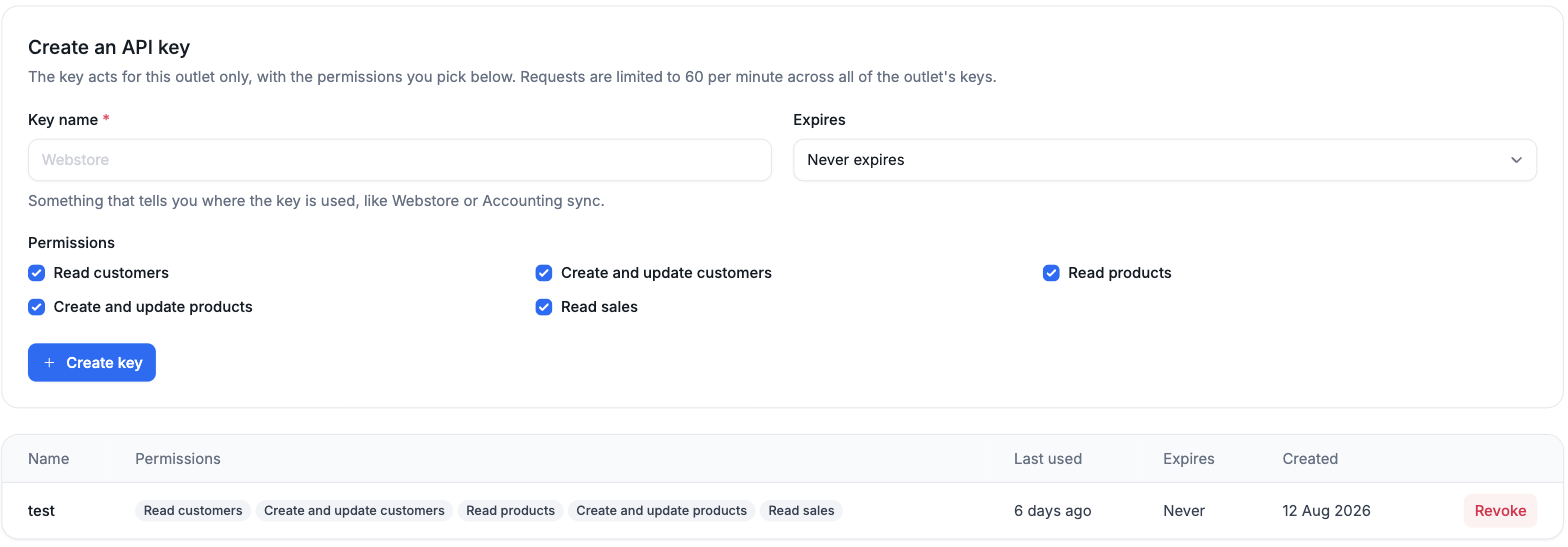
Under Settings, API Keys, create a key for each connection and pick exactly what it is allowed to do:

  • read customers, or create and update them
  • read products, or create and update them
  • read sales

Nothing outside the boxes you tick. Each key works for one outlet only, and requests are limited so a misbehaving connection cannot slow your shop down.

Creating an API key in Settings

A few things we made sure of:

  • The key is shown once when you create it. We keep only a locked copy, so nobody can read it later, not even us.
  • Sales can be read and their invoices downloaded as PDF, but nothing outside Seyls can ever create or change a sale.
  • Give a key an expiry date if the access should be temporary, or press Revoke at any moment and the connection stops right away.

For the person building the connection, the full guide lives at seyls.com/docs/api.