Open your cash register
Selling starts with an open register. From the Main Menu open Point of Sale; if your register is closed, we ask you to open it first with your opening cash balance, the float you start the day with. At closing time you count the drawer, close the register, and Seyls shows any difference.
The sale screen at a glance
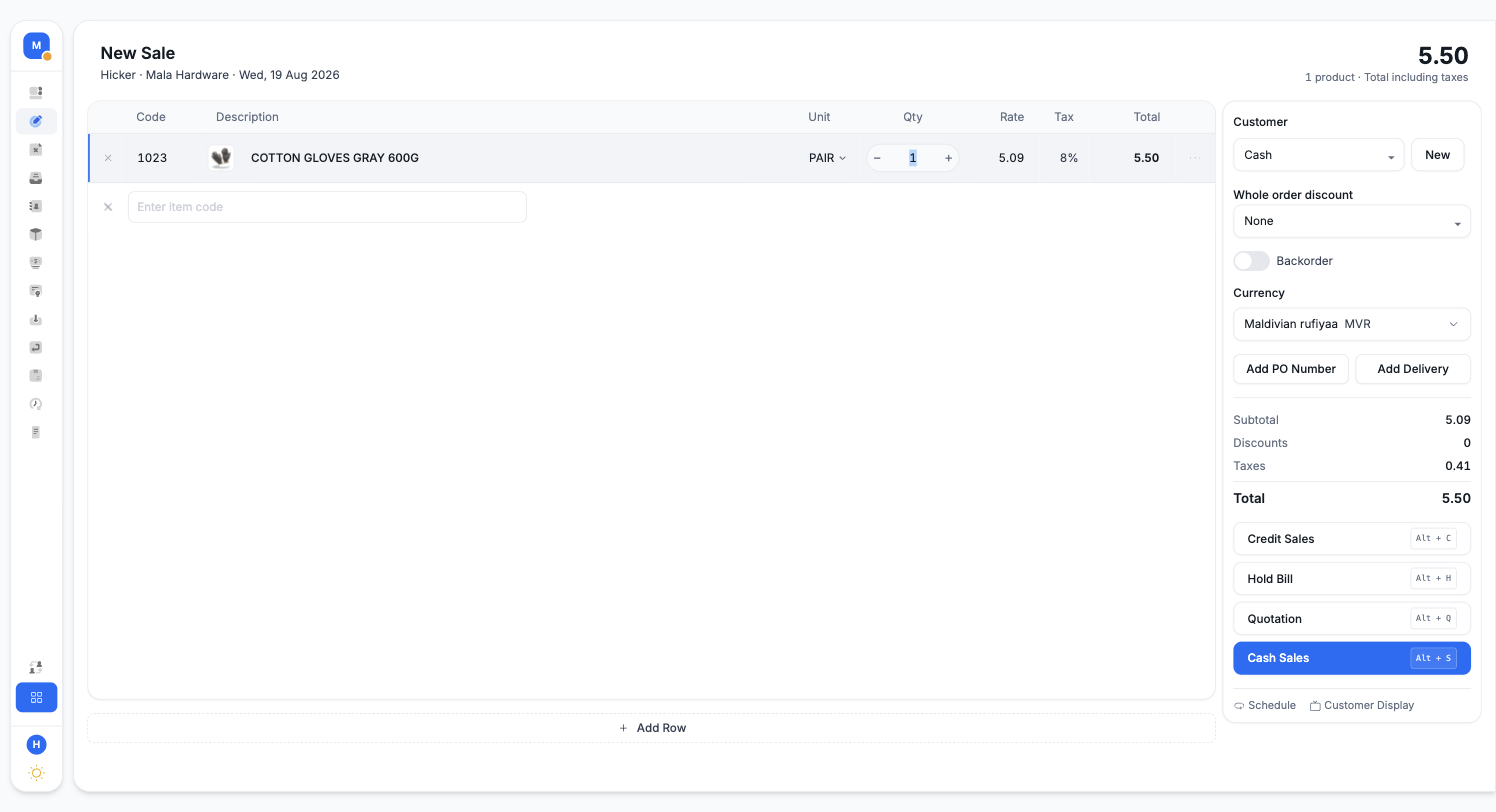
Open New Sale. The items grid sits on the left, the order panel on the right, and the running total stays at the top right with the product count.
Finding products
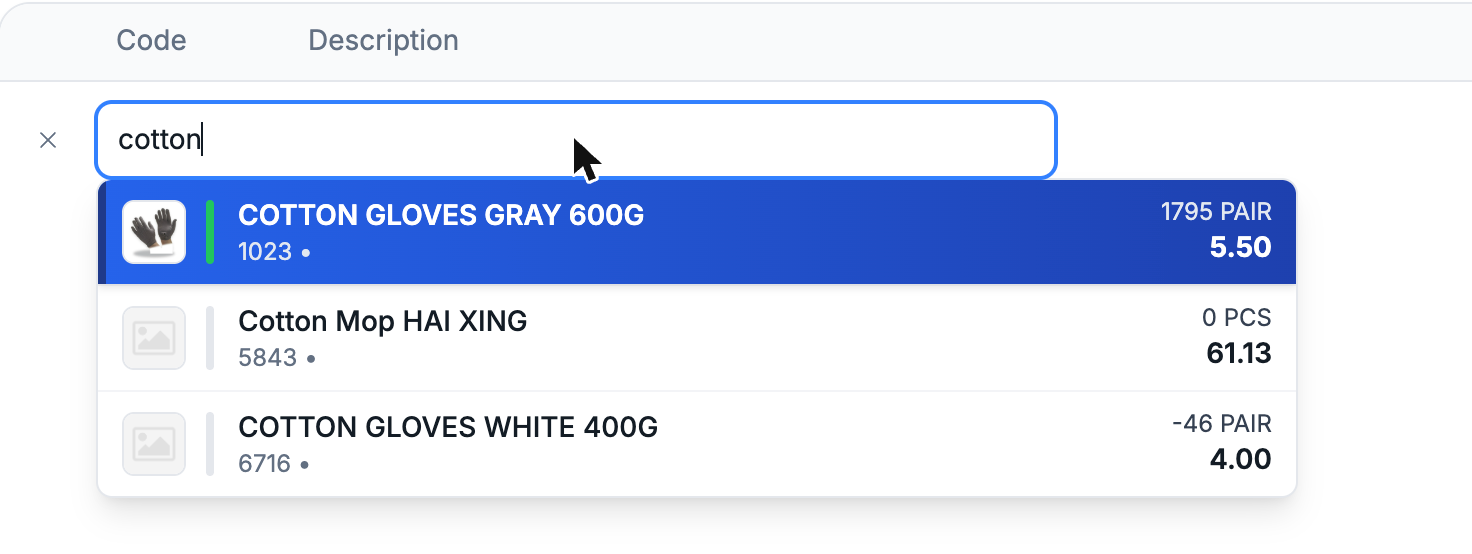
The item search box is where every line starts:
- Scan a barcode and the product is added instantly.
- Type part of the code or the name and suggestions appear as you type, each showing the product photo, code, stock on hand, and price, so you can tell similar products apart before picking one.
After a product is added, where the cursor goes is up to you: straight to the next search box, or stopping on the quantity first. Choose under Settings, Point of Sale, After adding an item.
The items grid
Each line shows the code, description, unit, quantity, rate, tax, and line total.
- Unit: if the product sells in more than one unit, pick it per line, a piece on one line and a box on another is fine.
- Quantity: type it or use the plus and minus steppers.
- Rate and Total: adjust the rate on a line, or type the final line total and we work the rate backwards, whichever is easier. Rate changes can be switched off for staff in settings.
- Remove a line with the small cross on its left.
- Same product again? Scanning it a second time simply increases the quantity on the existing line instead of adding a duplicate.
- The three dots at the end of a line show the product's details at a glance.
Selling what is not on the shelf
Out of the box, we stop a sale line when the product has no stock, with a message telling you so. When real life disagrees, you have two ways forward:
- Sell without stock, always: under Settings, Point of Sale, switch on Allow products to be sold without stock. Sales then go through even at zero stock, and the product's balance simply goes negative until you receive stock and correct it. Simple, but your stock numbers stop being a hard truth.
- Backorder, case by case: keep that setting off and flip the Backorder switch on the sale screen just for this sale. The sale is recorded as a backorder, so you can take the order now and bring the goods in afterwards, and your shelf balances stay honest instead of drifting below zero. It is also the natural way to sell a one-off special order, something a customer wants once that you do not normally stock: create the product, sell it on backorder, and buy it in for them.
Two settings under Settings, Point of Sale decide what a backorder may become: Allow backorder sales and Allow backorder quotations. With only quotations allowed, the backorder switch turns the bill into a quote to confirm later; with sales allowed, you can finish it as a cash or credit sale right away.
The order panel
- Customer: sales go to the walk-in Cash customer unless you pick one. Press New to create a customer right there, no need to leave the sale.
- Whole order discount: apply one of your configured discount rates to the entire bill.
- Backorder: the out-of-stock switch described above, off by default on every new sale.
- Currency: sell in another currency at your configured exchange rate.
- Add PO Number attaches the customer's purchase order reference to the invoice, and Add Delivery records delivery details for the order.
- The totals block keeps subtotal, discounts, taxes, and the grand total in view.
Finishing the sale
The buttons at the bottom right close the sale, each with a keyboard shortcut:
- Cash Sales (Alt + S): record the payment as cash, card, transfer, or cheque. For cash, enter the amount tendered and we show the change. The receipt is ready to print the moment the sale is saved.
- Credit Sales (Alt + C): the amount goes on the selected customer's account, to be collected later.
- Hold Bill (Alt + H): set the bill aside, serve the next customer, and resume it from Bills On Hold.
- Quotation (Alt + Q): save it as a quote instead of a sale, and convert it when the customer confirms.
Schedule turns the bill into a recurring invoice, and Customer Display shows a customer-facing screen of the bill while you ring it up.